June 16th, Hiawassee, GA
"I don't know....you seem to be in a different mindset this time," my sister exclaimed as we double-checked our packs the night before our journey was to begin. "I think I liked you better when you had a smile on your face," she added, referring to the smile that was always on my face during the first leg of our AT adventure back in September, 2012.
"That's because I know what I'm getting myself into this time," I stated, re-playing the three sleepless nights we'd suffered through all those months ago...it's very loud in the woods at night.
We continued loading our bags in silence, each of us lost in our own thoughts about what was to come. In hindsight, I'm glad my only worry that night was whether or not I'd get any sleep. I truly had no idea just what I was getting myself into.
June 17th, Neel's Gap to Low Gap Shelter (11.5 miles)


We began our trek up at Neel's Gap on a morning that looked a lot like this one. We waited around until Mountain Crossings opened at 8:30 so we could grab a long sleeve t shirt to take in case we got chilled...
I have to admit that my sister and I both watched in silence as our transport from Hiawassee to Neel's Gap disappeared back down Blood Mountain. I seem to remember that one of us actually joked about just going around the corner and checking into the Blood Mountain cabins for the days we were suppose to be hiking. I can't put my finger on just what my hesitation was, other than that I knew that when darkness fell, I'd lie awake in my tent, terrified of what roamed out there in the night. After a long moment, we made a quick trip into Mountain Crossings for a t shirt and one last bottle of Diet Coke. We couldn't put it off any longer. We had 11.5 miles to go that day that wasn't going to walk themselves so we hoisted on our packs, looked at each other one last time....and off we went...through the arch that marks the only place the A.T. actually goes directly through a man-made structure. Our journey had begun.
Before I go any further, in all fairness to the mountains that seemed to try so hard to show us who was boss, I have to admit that I left for this journey pretty much completely out of shape so I can't place all the blame on those never-ending piles of rocks. That being said, Mother Nature didn't waste any time proceeding to kick our Florida butts all over the place. We left Neel's Gap (elevation 3125ft) and immediately began an ascent that would take us up 817ft in about 1.5 miles, crossing Levelland Mountain (I suppose there's a joke hidden in that name somewhere). As Mountain Crossings disappeared behind us, we were in awe of the almost tropical foliage that surrounded us. It was dense, crisp, and green. Oh...and it wasn't long before the rain decided to join us. We've decided it simply wouldn't be a hike on the A.T. if it didn't rain on us for a fair portion of the way. We did luck out this time, however. While we started with our pack covers in place, we never did feel the need to don our rain gear. The canopy provided us with enough shelter to prevent a thorough soaking like we endured back in September.


Somewhere along the trail, we stopped for lunch. Over all of our hikes, we have learned that in order for us to perform all that is demanded of us, we have to stop for a hot lunch. The first day is always the most disorganized when it comes to this, requiring us to pretty much unpack our bags, pull out our bladders for the water we need, and then pack it all back. We had this process streamlined by the start of the second day, mind you. Once lunch was done, we slowly (and achingly) continued on. We only had two options for camp that day...Whitley Gap Shelter which is not quite 7 miles from our starting point AND almost 1.5 miles off of the A.T. or Low Gap Shelter, 11.5 miles from our starting point. That was our goal for the first day...a lofty on, I can say now. Passing the sign for Whitley Gap, we began our descent into Hog Pen Gap, bringing us out onto a paved road. We have laughed often about how you don't really realize how much you compensate for walking on the trail, over rocks, and on slick ground until you reach a paved road such as we did. You suddenly coming busting out of the woods and stagger across the road, praying that you can get across fast enough...for some reason, the crossing point always seems to be located in a curve, providing limited sight distance. I swear, it feels like you're walking drunk and I have no doubt that I'd have failed the "walk the straight line" test if the cops had given it to me.

Hog Pen Gap. 4.4 miles to go before we would reach the Low Gap Shelter. Before crossing the road, we took advantage of a wonderful water source and refilled our almost empty hydration bladders. 4.4 miles to go. Yeah...I keep saying that...but we were already quite beat. One charming young lady at the water source told us the terrain ahead would present us with "gently rolling slopes." Okay...we could handle that. Alas, the app she had for her smart phone was a bit off in its description of the terrain....but it still was nothing like what we'd already put behind us. At one point, it felt as if it was all I could do to simply put one foot in front of the other and move forward, but we kept our spirit and rolled into Low Gap around 7pm....we left Neel's Gap around 8:45am (figuring maybe 45 minutes for lunch).

We'd been racing the rain as the thunder seemed to draw closer to us, so, as tired as we were upon our arrival at Low Gap, we had to hustle and get our camp set up in case the skies decided to do so. The Low Gap shelter area is really a lovely place to camp. There are several campsites along the entrance trail and the water source flows directly behind a couple of them. A bit further down, you actually cross the small creek to get to the shelter and other campsites. There is a privy there...it's located up top of a very steep little incline but at least it's there if you need it. We ate our dinner, had our coffee and climbed into our tent...completely exhausted from the demands of our first day of hiking. The charming young lady we met at the Hog Pen Gap water source and her boyfriend were set up next to us...they were hammock camping. We shared the area with several other hikers that night and it was really a great evening. Once inside the tent, my sense of hearing underwent its almost bionic transformation as darkness fell and I waited for the creatures of the night to appear outside the tent. Luckily, our only company seemed to be a group of large owls, calling back and forth, sounding almost as if we had monkeys in the trees around us. I did manage to relax a bit but I didn't sleep. The woods is a very loud place at night.
June 18th, Day 2: Low Gap Shelter to Blue Mountain Shelter (7.2 miles)
Because we knew we were going to have such a long first day, when I planned our hike, I put us at the Blue Mountain Shelter for our second night. We were going to need a shorter day to recover.

The trail made its way through more dense vegetation, often clinging to the side of the mountain...let's just say that you didn't want to step too far to the right or that first step would be a big one! Water was plentiful had we needed it.


We stopped for lunch at Chattahoochee Gap. We weren't expecting the wind to be howling through the gap and because we'd walked most of the morning in the rain, it didn't take long for us to be chilled all the way through. Lunch was quick that day and we were soon on our way again.
I'd say about halfway to Blue Mountain Shelter, the terrain suddenly changed to rocks....rocks...and more rocks...taking us up the mountain. Progress was slow to say the least. Climbing on rocks can be treacherous, and the rain wasn't helping our cause. At one point, my sister's trekking pole became lodged between the rocks and we thought it was broken. After standing in silence for a couple of minutes, staring at the pole (and each other) she was able to fix it and we continued. I was definitely "feeling the burn" as I continued to haul my big butt (and pack) up one large rock after another. Without warning, my sister said, "They must call this Mountain Goat Gap and we should've watched more National Geographic to see how they handle this kind of terrain." It's very important to keep the mood light at all times. It's part of the mind game these mountains love to play with you....after all, they were there first and we are the "crazy" ones for thinking we wanted to walk their walk. We survived our rock climbing and pulled into our destination early, at around 3:45pm.
 | ||
| Blue Mountain Shelter |
 |
| Where we set up camp for the night. |
It should be noted that the Blue Mountain Shelter rests on the north side of the mountain and has a reputation for always being cold. The wind was brisk when we arrived and this, coupled with the fact that we were soaked with sweat and rain, gave us a taste of how this place had earned its reputation. But, we simply put on our long sleeve t shirts and again, as luck would have it, the clouds rolled in and the wind grew still. The weather gods were cutting us some slack that evening. We'd been at the shelter area for maybe an hour when a man and two teenage boys arrived. We all took advantage of the shelter to cook and just chat about our days...turns out they were from Orlando. It really is a small world sometimes. Beat from lack of sleep the night before and our afternoon of rock climbing, we retreated to our tent around 7:30pm just to lay there and relax. At some point, another man arrived at the shelter. We nicknamed him "Mr. Talksalot" because not only did he talk constantly, he spoke loudly. Still, it was obvious he was a nice guy and by 8:15 or so, the camp grew quiet....almost eerily quiet actually. There was no sounds at all coming from the woods...not even the sounds of bugs. On a side note...turns out Mr. Talksalot also talks in his sleep...all night, in fact. I don't know what time it was when he awakened us with a cry of "Help!" Now...that's not exactly what you want to hear when you're in the woods, in the dark and not knowing what was out there. We listened for a bit longer until we were able to assess that he was simply dreaming and talking out and not actually in need of assistance. Good thing...I would've gone to help but begrudgingly so seeing as how I'm so terrified of the dark. We were blessed with sleep that night and woke feeling much better both physically and mentally than we had the night before. Little did we know how our fortitude would be tested that third day.
June19th, Day 3: Blue Mountain Shelter to Tray Mountain Shelter (7.8 miles)

We were the last to leave the Blue Mountain Shelter that morning, finally lifting our packs (and our spirits) and heading out around 9am. The sun was out and it was promising to be a beautiful day. We had another relatively short one planned...only 7.8 miles to our next stopping point. No problem. We got this! We quickly reached the summit of Blue Mountain and started down towards Unicoi Gap. We seemed to be in great form, hauling it down the mountain (literally) and busting out of the woods (again) to cross the road before us.

I can't lie. Our smiles and a bit of our great attitude quickly disappeared as we began our next ascent....one that would take us pretty much straight up, without the use of switchbacks, 1068 feet in 1.3 miles, to the summit of Rocky Mountain. Trust me...we were not seeing the humor in this in any way. At some point, my sister stopped and said,"This f***ing mountain can only be SO high!" It was also on this ascent that we agreed that switchbacks really were our friends. This "straight up the mountain" approach was not pleasant!
I have no idea how far up we were when we were passed by a man probably in his 70's, scooting up the mountain with no pack (not even water) at a rate that we just could not comprehend. He stopped and talked to us as he passed, giving us a much-needed break. Come to find out, he'd been doing trail maintenance on the 10 mile section of the A.T. we were now on for many years. He explained to us how he would haul his weed-eater up the mountain periodically and use it to provide hikers with views we wouldn't find anywhere else. He also told us about the rock placements at Indian Grave Gap and how long it took the volunteers to get it all done. Finally, he bid us farewell, saying he was doing a flip hike and would see us on his way back down. Off he went, almost skipping up that steep trail (mind you, while stopped we were having to lean at close to a 90 degree angle to keep the weight of our packs from pulling us backwards). Okay...so let's go find the views!


It didn't seem like we'd gone very far when lo and behold...here came that same gentleman, looking no worse for wear. We chatted again for a few minutes and then he bid us "Happy Hiking." We smiled at him and moved on. I've got to admit that when we did finally reach Indian Grave Gap, the rock work was pretty awe-inspiring:

 | ||||||
| The view of the rock work at Indian Grave Gap (looking up from the bottom) |
We soon found ourselves in the middle of another steep ascent...this one taking us up 1317 feet over about 2.6 miles (so not quite as blunt as Rocky Mountain was). We cheered each time we crossed the forest service roads, knowing it meant our destination was slowly drawing closer.

We paused for a few moments when we finally reached the summit of Tray Mountain....the almost 360 degree view was stunning to say the least. We have always said that it's moments like these that make all the hard work worth it. For me, there's little that can equal the feeling of standing atop a mountain such as this one, looking out across the horizon...it frees my spirit...it does something to my heart. I can't describe it, but it is what keeps me doing it all...it "fixes" me I suppose.

We arrived at the Tray Mountain Shelter area, battered, bruised and blistered but proud of ourselves for having the drive to get as far as we had in spite of our adversities.

All I can say is that there is no way to really adequately describe how incredibly physically and mentally challenging doing something such as a hike on the Appalachian Trail can be. Unless you do it, you simply cannot understand. This being said, I don't say the things I do to discourage anyone from trying it. My goal is to be honest and paint a true picture of the level of difficulty as opposed to giving a glamorized picture of what being on the trail is like. Trust me when I say that the trail is no place for a diva. No place for someone who can't imagine going without a shower for a night. No place for someone who wants a leisurely stroll in the woods. But...if you're someone who wants to find out just what you're made of...just how strong you are...and just what you can do if you set your mind to it...then I say GO FOR IT!!!
Okay...in order to streamline our camp set-up, we've got a routine we follow. Our first order of business is always to just go on and get whatever water we're going to need for that night and the following morning. Get it out of the way. Most water sources are about 1/10th of a mile or so from the shelter and yes...usually require going down and back up. So...get it done so you can relax!
Since we had the shelter to ourselves, we opted to set up the tent inside the shelter since we could hear thunder and expected rain. Now...I've always read that the critters favor these shelters but we decided to take a chance. We learned our lesson and won't do it again unless the weather dictates we must.
 | |
| Relaxing after a "bath" with my coffee! |
It was nice to be able to hang our rainfly and other gear up to dry out overnight but we will make use of the campsites located at the shelter areas from now on. We didn't sleep at all that night between all the strange noises we heard (some of which we now feel were simply coming from some pieces of plastic under the shelter that got caught in the wind) and those that we knew were critters chewing on something. Yep...campsite is is from now on! Oh...we did attempt to wash up in the ice-cold stream after getting our water....and then we took turns going behind the shelter, stripping down and doing our best to wipe off. I never knew that putting on clean clothes could feel SO good!
June 20th, Day 4: Tray Mountain Shelter to Dick's Creek Gap (11 miles)
We woke to find ourselves in the clouds...

Because we knew we had what was suppose to be a 12 mile day, we were up at 6:15am so we could get an earlier start. We had been asked by our transport to check in and let her know about our progress so I was hoping for cell service. After assessing our blisters, knees and other injuries, we had a gut feeling we were going to have to call it and make this our last day of hiking. It was an agonizing decision but we knew we had to be smart about it all. So, I made the call and told our ride that we might have to be picked up that evening. She told me where my last chance to call would be and wished us well. We packed up our gear and headed out, our hearts heavy knowing this would probably be the end of our hike for now but also knowing that what we'd done was an accomplishment to be proud of.


It was a long 11 miles, plagued by yet another injury, but the amazing views around us were not lost in translation...this one makes me smile because when I look at it, I can almost see a heart in the way the foliage frames the backdrop of the mountains. I'll admit that by this time, we were ready for a break from the trail but the memories we would carry with us would last a lifetime. I won't lie...we struggled that day. There were times when we didn't think we could go another step. But we did. We did.
When we reached Powell Mountain, I slipped off onto a side trail so I could reach a point with cell phone reception so I could call our ride and let her know we would indeed need to be picked up at Dick's Creek Gap...still 2.2 miles away. I managed to snap this shot with my cell phone camera before returning to the trail:

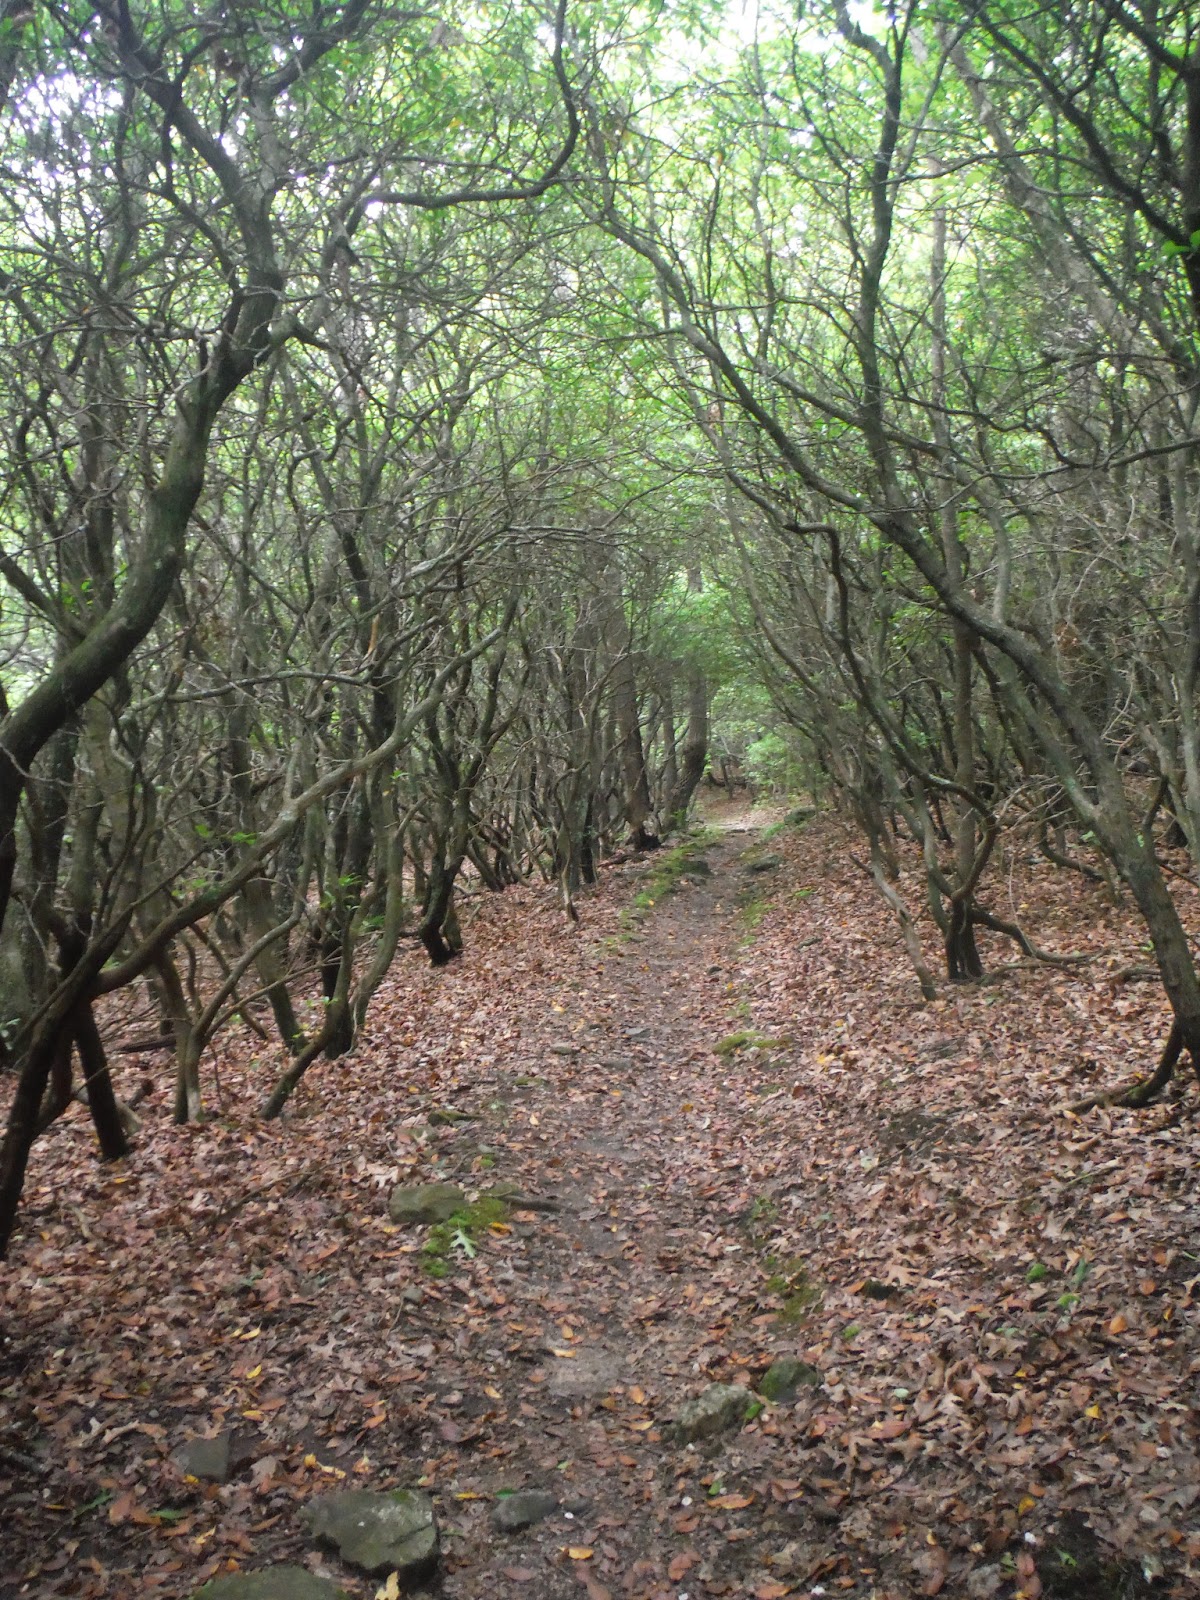
This might sound odd...and until I started distance hiking in the mountains, I would never have believed it could be true...but most times, going downhill hurts worse than going up. Our descent from Powell Mountain into Dick's Creek Gap took us down 1175 feet in 2.2 miles...over rocks...and more rocks. Watching the foliage change as we descended was amazing....when the Mountain Laurel is in bloom, it showers the trail with tiny white and pink flowers and arches over it as if to be welcoming you back down to level ground, weaving its maze tightly on either side of the trail.
I can't really describe the emotions we both felt when we finally reach Dick's Creek...

Somewhere inside, we both felt sad that we had fallen short of our goal by just a few miles...the GA/NC state line was only about 9 miles away. Still, there was an overwhelming sense of pride (at least in my heart) for what we had done. When we walked the 31 miles in September, 2012, we thought that was hard. Nothing prepared us for what we'd just endured....I can see why many who start with ambitions of a thru-hike let that dream go within the first few days. Walking the A.T. challenges you in every way possible...and in some ways you never knew were possible. But for those of us who accept that challenge and meet it head-on, it's what changes us and keeps us focused on what we can do when the going gets tough. I personally had a lot of baggage I was hoping to leave somewhere out there on that trail...and I was successful for the most part. This one changed me a bit...hopefully for the better....but one thing I know for sure: if I ever start to doubt just what I can do, I will think back on this hike, pick myself up, and move ahead!
Already looking forward to next time...Happy Hiking everyone!!!

